Measures
Before explaining the tool, few explanations.
Measures files, stored under /data/measures are used for many things :
Measuring the body of a character, like its height, the girth of its neck and so on.
Create general proportions of a model from measures given by the user.
Create random models by randomizing these measures.
An important note :
The file is a collection of keys/values (see below for details). The keys don’t change, only their value.
The keys are “hard-coded” i.e are used in other parts of the addon, like morphs. That means that for morphs, some of them must have a given name, whatever is the model.
That means that for the moment, the addon can’t be used “as is” for animals, and non humanoid creatures. Winged creatures would be OK, but without the need of measuring the wings for a reason.
How and when can creator use this tool ?
After creating the config file, at least, because some elements must be known to use the tool.
Its name is “Create measures template” and is available when the config file is created and base models / character template are entered :
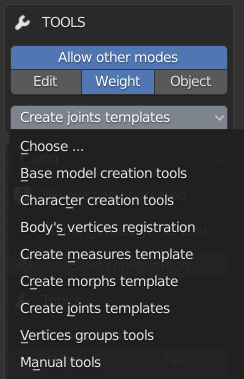
Things to do to use it :
The way Blender is working needs few things to do before using the tool.
The base models are shown (see doc about previous tools for details) but user need to be in edit mode to use some tools. It’s the case here, so toggle on “Allow edit mode”.
When the tool is chosen, you can choose the character template to work on. Even if it’s already visible since the beginning, choose it again. That hides all bodies except the base model for this character.
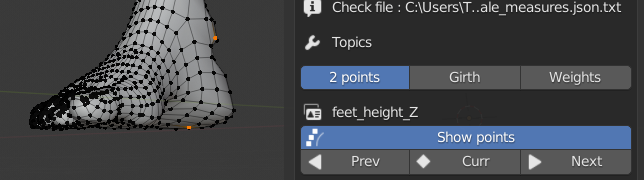
The character is active and has a red silhouette (see below) :
Click on it : the color becomes orange and now the model is selected. It’s important because you can create measures only if the model is active AND selected.
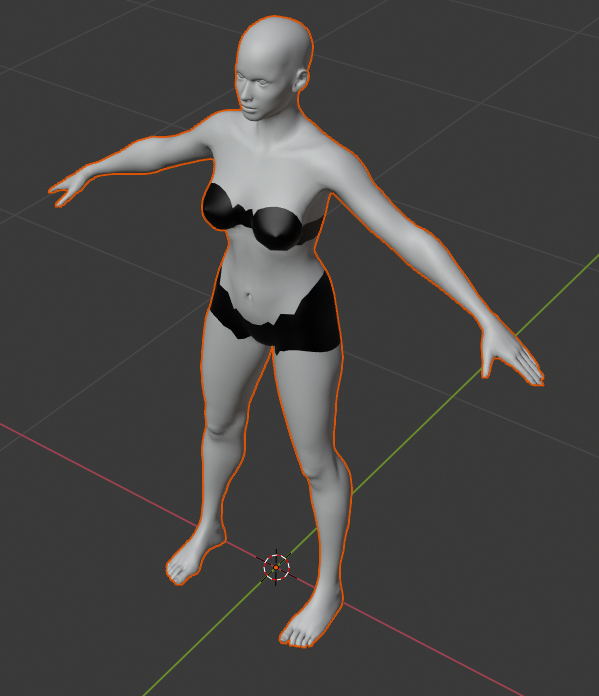
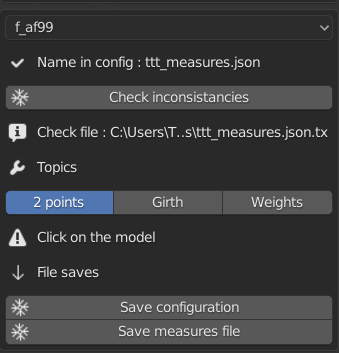
Example : 1st image, the model is not selected. Topics “2points”, “Girth”, “Weights” are inactive and addon asks to click the model :
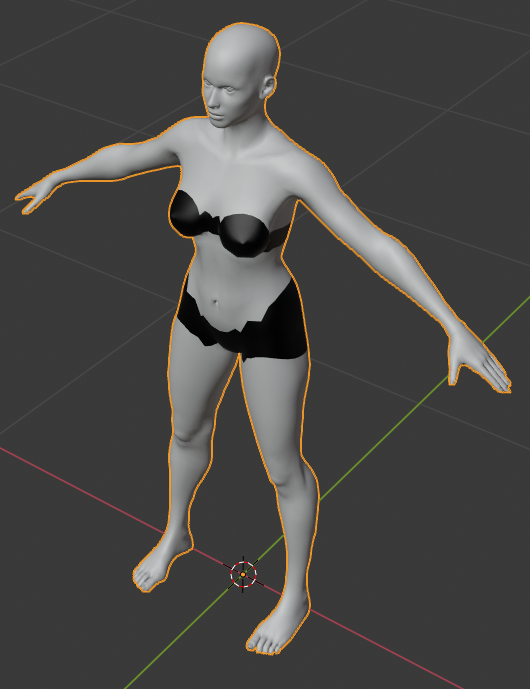
Now the model is selected, creator can now use the topics :
When all that is done you can start using the tool.
First, the creator must create the file. The file itself has strict rules, and is (in Python terminology) a dictionary with 4 keys :
body_height_Z_parts : the parts concerned by measures. Don’t change, and creator must not change the content.
measures : content that can be changed with all points needed for measures.
relations : relations between names given for measures and their counterpart as morph name. For example, measure “chest_depth_Y” corresponds to “Chest_SizeY_min/max” in morphs. This topic can’t be changed.
score_weights : The weight of body parts for the computation of measures.
The process to create the file is automatic and can be done after the creation of the config file.
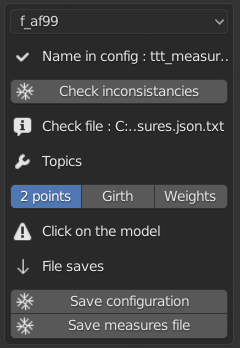
When filling the config file with the dedicated tool, let “measures file” on “unknown”. So when you start the measures tool you have this :
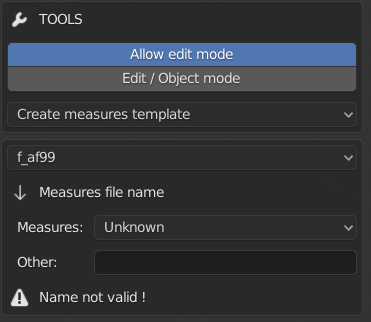
So, for the character f_af99 you can either choose a known file in a list, or create a new one (“other”)
Here we’ll choose an existing one :
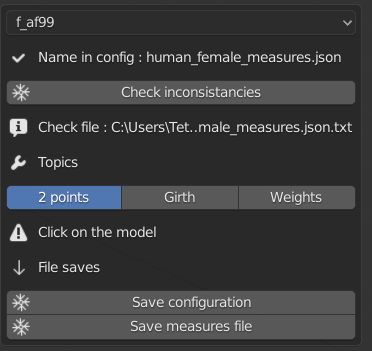
Since it’s chosen (human_female_measures.json) you can :
check inconsistencies. It’s a really basic tool that reads the file and seeks if it’s a valid one. Very basic. But useful when creator is not sure. The name and location of report is shown below the button.
In the bottom the creator can also save the config file, needed if he created the file or has picked one in the list.
When it’s done (if necessary), the creator must :
Choose again “f_af99” on the top to hide all models but the one used by the character template.
Click manually on it to set it active and selected.
Then he can create points for measures (“2points” and “girth”) or weights (‘Weights”).

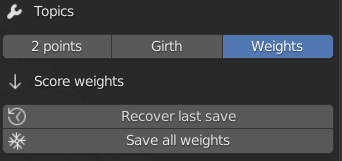
Now the model is active, selected and the measures file is known/created. From there, you have 3 topics to fill : 2 points, girth and weights.
2 points : a distance, between 2 points for a measure. The width of a foot, the height of the character and so on. Sometimes the points are symmetrical (shoulders width for example). Complete list :
“upperleg_length”, “buttock_depth_Y”, “buttock_width_X”, “lowerleg_length”, “head_height_Z”, “feet_length”, “feet_heel_width”, “torso_height_Z”,”shoulders_width”, “feet_height_Z”, “head_width_X”, “chest_depth_Y”, “forearm_length”, “buttock_height_Z”, “hands_width”, “hands_length”, “upperarm_length”, “feet_width”, “body_height_Z”, “neck_height_Z”, “head_length”, “chest_width_X”
No particular order. These names are automatic and created when you create the file. Always create the file from the tool.
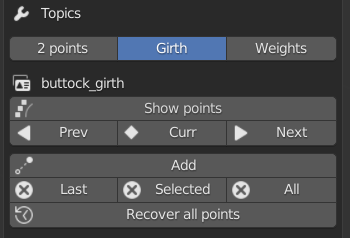
Girth : The girth of body parts like upper leg, the neck. No symmetry here, as a girth of the left arm will be the same for right arm. Complete list :
“wrist_girth”, “upperarm_axillary_girth”, “neck_girth”, “lowerleg_bottom_girth”, “lowerleg_calf_girth”, “upperleg_top_girth”, “waist_girth”, “elbow_girth”, “upperleg_bottom_girth”, “chest_girth”, “buttock_girth”.
No particular order. These names are automatic and created when you create the file.
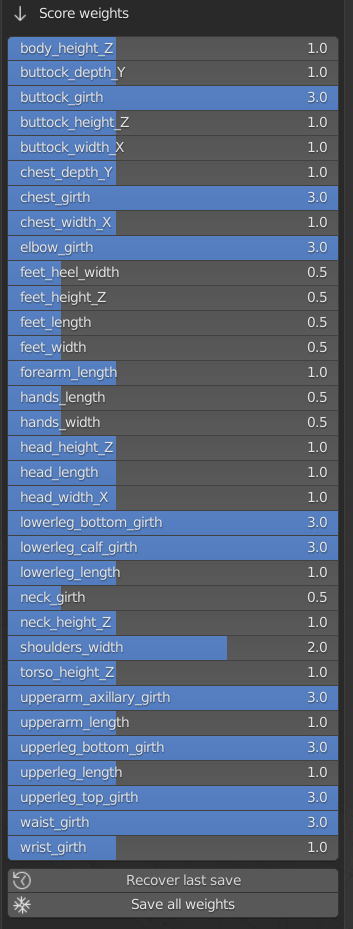
Weights : Some parts are more important for internal computations, so they have more “weight” than others. For example the top of the upper leg is more important than the width of the foot. So the first will have a weight of 3 (the maximum) and the second will have 0.5 (the minimum).
Write all parts would be tedious, and are created/filled with standard values automatically. These values are the ones used for original models.
Except if the creator really knows what he does, I suggest to let the standard values.
So how to change the values ?

Important note : When you select points, only the last one can be saved and used by python. It’s how Blender works. So if you want to select 5 points and save them, you have to select and save each point. Select, save, select the other, save it, and so on.
2 points. (reminder, you must be allowed to go to edit mode, the model active and selected).
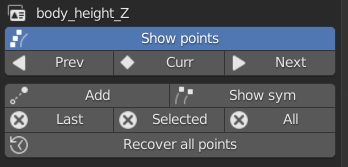
The first line is a a label where you see the current measure in memory.
Show points : Allows you to see the points on the body.
Prev(ious), Curr(ent), Next : Put in memory and shows (if “shows points” is selected) previous, current or next ‘2 points’. Example :
If no point is filled, nothing is shown.
Now, if user wants to change them, he can use these buttons :
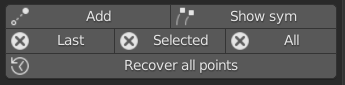
Add : Add the last selected point by the user. If 2 points already exist, the first is deleted and replaced by the 2nd.
Show sym : When you select/save a point, you can highlight its symmetry. Careful, even if it’s highlighted (the point is orange), it’s not selected. You have to select it manually (the point is white), then you can save it (‘add’).
Last, (X) Selected, (X) All : Delete last point, the one you selected manually, or all points.
Recover all points : Recover the ‘2 points’ from last save (in file).
See documentation below about all ‘2 points’ pictures for the original models.
Girth. More or less the same thing for adding/changing points for the girths.
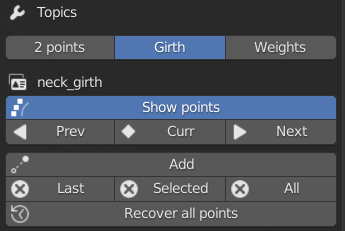
Here an example with the neck :
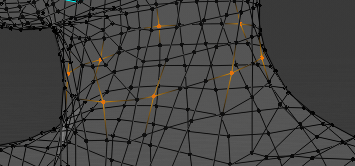
You can see that you don’t have to save all points around the neck. A girth doesn’t have to be perfectly exact.
Other thing important, a girth starts by a point, and finish by the same point. But you don’t have to select it when you finish, it’s automatically done when the file is saved.
All buttons have the same function as ‘2 points’ (no symmetry). But you have to select all points in the order. The girth is calculated by the order of selection.
See documentation below about all ‘girths’ used in the original models.
Weights. At first you have this :
That means that you have to refresh the values first (again, it’s because how Blender works). Click on “recover last save”. This button can be used each time you want to recover last saved values (in memory).
You can now change the values. The changes are saved (in memory) each time you click on “save all weights”.
Again, if you don’t know exactly what you do, let the standard values. Those values are used for the original models, and always saved when you create a measures files with the tool.
Finally you can save your work on file :
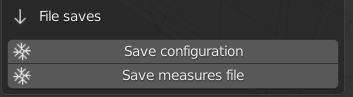
Save configuration ; If you have created/filled the measures file with this tool, and not when you created the config file, you can save the measures file name here.
Save measures file : Save the measures file itself.
For both saves, the location is automatic, user has nothing to do, the user has already filled the names.
Note : You can’t change/add any name here, as they are “hard-coded” in the morph engine.