Joints
A tool that is directly related to skeleton and animation because this toll creates joints and offsets for them, in two separated files.
First, the basic skeleton available with MB-Lab in the base package, is a skeleton very outdated in many ways. Animation, type of skeletons, all that jazz are changing fast as the games engines, animation engines and so on, are improving constantly to give better technics to animate the characters. That said, MB-Lab was first developed in an user point of view, where users can develop only few things. Now user can also be a creator and able to create a whole character from scratch. Thereby, skeleton system should be able to change to fit new technics, needs (game, animation, …) without need to change the program. For this purpose, MB-Lab provides this outdated skeleton system, that the creator must adhere, in order to let other skeleton systems to do their stuff without problem. Of course, since these two templates are created, the creator can add his own skeleton system ; but this way, his character is assured to work well in the engine and be easily adapted for other systems.
The skeleton system in MB-Lab works works with 4 things :
A base skeleton.
A skeleton for muscles (see dedicated documentation).
A joints file.
An offset file.
These 2 files have to be created, as they manage the base skeleton.
Joints File
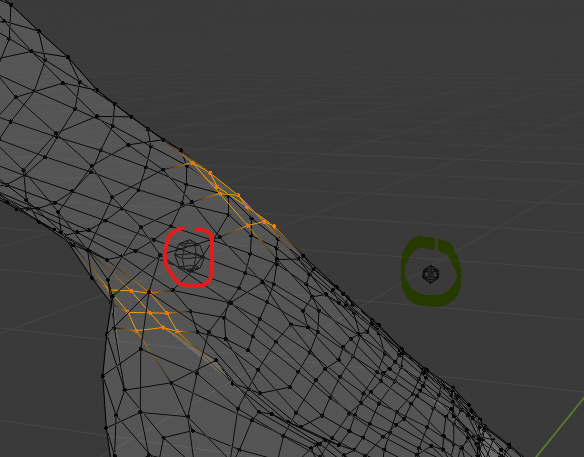
It’s a file where the locations of the head and tails of for for skeletons, base and muscle, are stored. But the location is not stored itself ; instead vertices indices for a specific joint are stored, and the geometric center of those vertices (in red on the picture) is the location of the joint. As this point changes due to the morphing of the character, it’s dynamic, so it’s the vertices that control the position are stored.
Offset File
Sometimes the joint is used for inverted kinematics. This file allows to offset it in order to place the command. (the icosphere circled in green)
The tool for these 2 files drives the creator a lot, as the names can’t be changed, as the number of bones.
Again it makes adaptations for other skeleton systems easier.
So, how does it work ?
The beginning works exactly like the measures tools :
You must allow to be in edit mode.
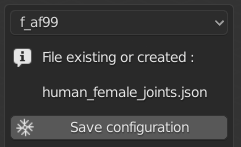
You choose a character you want to work on (here f_af99).
You choose it in the drop-down list, and click manually the model to active it.
The tool already knows the file, or you have to fill the name or create the file.
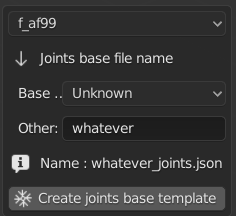
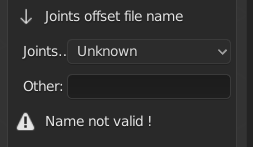
When it’s done for joints base file, do the same for offsets :
Now don’t forget to save the config file if it’s OK for you :
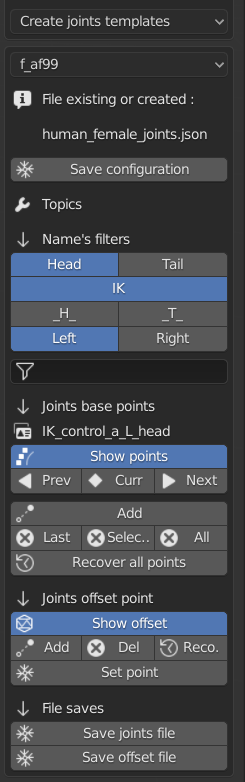
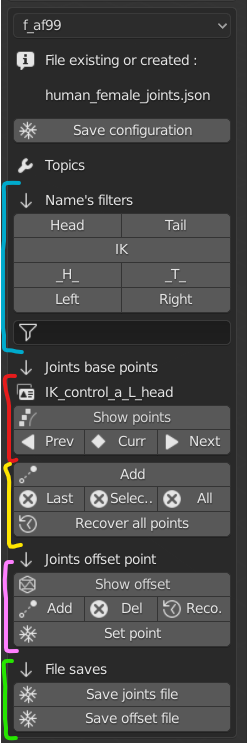
Now the tool as 5 parts to work with :
Note : When the 2 files are created, don’t change anything manually ! Change with this tool.
Part in blue : Allows you to filter quickly the names in the data base. You can also use the string field to filter the part you want (like arm for example).
Part in red : As measures file tool, you can show all joints stored in file. Here the toll shows 2 things : the vertices, and the geometric center of the points. The center can’t be selected manually, you don’t have to anyway. See documentation for a list of all joints and the vertices selected in the base model.
Part in yellow : Like measures points, you can add, delete or recover vertices here.
Part in pink : Same tools to show offset point, except few things.
Many joints don’t need offset, so you don’t have to create it if you don’t have to.
When you create it, an icosphere is created, and is located in the center on the center point (wich is an uvsphere). You can then go in object mode, place it where you want, then return in edit mode, then press ‘Set point’ to save the location in memory (not in file, there’s a special button for that)
If you delete the point you can recover it with the “Reco.” button. But careful : Il you go to another joint, and come back later, you can’t recover the offset from the file.
Part in green : You save your work in file. One for the joints base, one for the offset.